
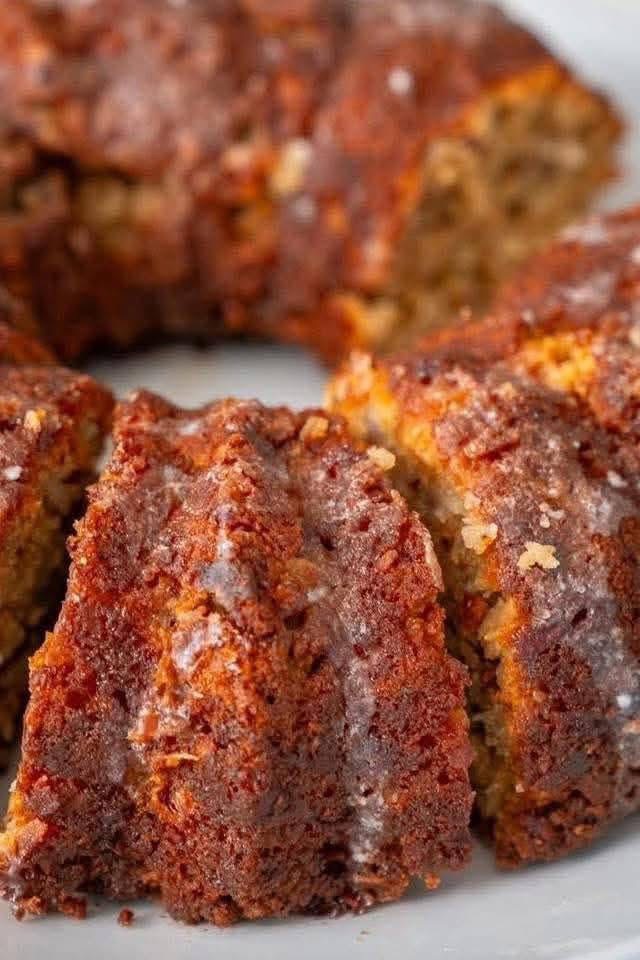
There are certain desserts that carry the weight of memory—the kind that transport you back to your grandmother’s kitchen the moment you take a bite. This Vanilla Wafer Cake is exactly that. It is an old-fashioned Southern classic, born from the ingenuity of home bakers who knew how to transform simple pantry staples into something truly magical. With its tender, buttery crumb, its delicate vanilla fragrance, and those little nubbins of sweet cookie throughout, this cake tastes like Sunday suppers, summer afternoons, and the warm embrace of family. It is the kind of dessert that doesn’t try to impress with fancy techniques or exotic ingredients—it simply delivers pure, unadulterated comfort in every single slice. This is the cake that Nana always had waiting on the counter, and now it can be yours too.
For the Vanilla Wafer Cake
-
1 (11-ounce) box vanilla wafers (about 3 ½ cups crushed, or 1 ½ cups whole wafers, crushed)
-
½ cup (1 stick) unsalted butter, softened
-
½ cup vegetable shortening (or additional butter, for a richer flavor)
-
2 cups granulated sugar
-
4 large eggs, room temperature
-
½ cup whole milk, room temperature
-
2 cups all-purpose flour
-
2 teaspoons baking powder
-
½ teaspoon salt
-
2 teaspoons vanilla extract
-
1 cup sweetened flaked coconut (optional, for a tropical twist)
-
1 cup chopped pecans or walnuts (optional, for added crunch)
For the Glaze or Frosting (Optional but Lovely)
-
1 cup powdered sugar
-
2 to 3 tablespoons milk or heavy cream
-
½ teaspoon vanilla extract
Preparing the Pan and Oven
Preheat your oven to 325°F (165°C)—a slightly lower temperature than standard cakes, which allows this dense, rich batter to bake through evenly without over-browning the exterior. Generously grease and flour a 10-inch tube pan or Bundt pan, making sure to get into all the nooks and crannies. For extra insurance against sticking, you can also line the bottom of the pan with parchment paper cut to fit.
Crushing the Vanilla Wafers
The soul of this cake lies in those humble vanilla wafers. You can crush them in a food processor until they become fine, sandy crumbs, or place them in a sealed plastic bag and roll over them with a rolling pin until they are broken into small pieces. Some bakers prefer to leave a few larger chunks for delightful pockets of cookie texture throughout the cake. Whatever method you choose, you should end up with about one and a half cups of crumbs. Set these aside—they will be folded into the batter and also sprinkled into the pan.
Making the Batter
In a large mixing bowl, cream the softened butter and shortening together until the mixture is light, fluffy, and pale in color. This should take about three to four minutes with an electric mixer on medium speed—the creaming process is essential here, as it incorporates air that will help the cake rise despite its dense ingredients.
Gradually add the granulated sugar, beating well after each addition, and continue mixing for another two to three minutes until the mixture is fluffy and the sugar has dissolved into the butter. Add the eggs one at a time, beating thoroughly after each addition to ensure they are fully incorporated. Stir in the vanilla extract.
In a separate bowl, whisk together the all-purpose flour, baking powder, and salt until they are evenly combined. With the mixer on low speed, add the flour mixture to the butter mixture alternately with the milk, beginning and ending with the dry ingredients. Mix just until combined—be careful not to overmix, as this can make the cake tough.
Fold the crushed vanilla wafers into the batter gently with a rubber spatula, distributing them evenly throughout. If you are using coconut or nuts, fold them in at this stage as well, taking care not to overwork the batter.
Baking the Cake
Sprinkle a few tablespoons of the crushed vanilla wafers into the bottom of your prepared pan, creating a thin, even layer that will form a lovely, slightly crunchy crust. Pour the batter into the pan, smoothing the top with a spatula. The batter will be thick and rich, almost like a cookie dough, which is exactly how it should be.
Bake the cake for fifty-five to seventy minutes, rotating the pan halfway through, until a toothpick inserted into the center comes out clean or with just a few moist crumbs attached. The top should be deeply golden brown and the cake should begin to pull away slightly from the sides of the pan. If the top is browning too quickly before the center is done, tent it loosely with aluminum foil for the final fifteen minutes.
Let the cake cool in the pan on a wire rack for fifteen to twenty minutes, then carefully invert it onto the rack to cool completely. The aroma that fills your kitchen at this moment—buttery, vanilla-laced, and deeply comforting—is the smell of nostalgia itself.
Adding the Glaze (Optional)
While the cake is cooling, you can prepare a simple vanilla glaze to drizzle over the top. In a small bowl, whisk together the powdered sugar, milk or cream, and vanilla extract until smooth and pourable. The consistency should be thick enough to coat the back of a spoon but thin enough to drizzle. Once the cake has cooled completely, pour the glaze over the top, allowing it to cascade down the sides in beautiful, ivory ribbons. For a more rustic presentation, you can simply dust the cake with powdered sugar.
Serving and Storing
Slice the Vanilla Wafer Cake into generous wedges and serve it at room temperature, with a cup of hot coffee or a tall glass of cold milk. The texture is uniquely wonderful—dense and buttery like a pound cake, but with those delightful pockets of vanilla wafer that add a subtle crunch and an extra hit of sweet vanilla flavor.
Leftovers can be stored in an airtight container at room temperature for up to five days. The cake actually becomes even more moist and flavorful as it sits, the vanilla wafers softening slightly and melding into the crumb. It also freezes beautifully for up to three months; simply wrap it tightly in plastic wrap and then in foil, and thaw it at room temperature when you are ready to enjoy.
A Few Grace Notes
This recipe is wonderfully adaptable to whatever you have in your pantry. Some bakers swear by adding a cup of chopped dates or raisins for a chewy, fruity contrast to the buttery cake. Others prefer to skip the coconut and nuts entirely, allowing the pure vanilla flavor to shine through. You can also experiment with different cookie varieties—butter cookies, shortbread, or even chocolate wafers all create their own delicious variations.
If you want to take this cake over the top, try soaking the crushed vanilla wafers in a few tablespoons of bourbon or rum before folding them into the batter. The alcohol adds a warm, grown-up depth that pairs beautifully with the vanilla and butter.
Vanilla Wafer Cake is more than just a dessert—it is a taste of simpler times, a reminder of the women who came before us and the love they baked into every meal. With its sweet, buttery crumb and its nostalgic charm, this cake is the kind of recipe that becomes a family treasure, passed down through generations and baked with love for years to come.