Sweet, juicy cherries are one of summer’s greatest pleasures—but the story doesn’t have to end once you’ve eaten the fruit. With only a handful of common supplies, you can turn that leftover pit into a thriving cherry seedling in as little as a week. Ready for some zero‑waste magic? Follow this step‑by‑step guide and watch new life take root on your windowsill.
🌱 Why Grow a Cherry Tree from a Pit?
-
Free fruit for the future: A mature tree can yield up to 100 lb (45 kg) a year.
-
Educational for kids & adults: A hands‑on lesson in botany and patience.
-
Eco‑friendly: Transform kitchen “waste” into a living plant.
-
Aesthetic bonus: Cherry blossoms are legendary for their springtime beauty.
🧰 What You’ll Need
| Material | Purpose |
|---|---|
| Fresh cherry pits, washed & dried | Your seeds |
| Paper towels | Wrap seeds for cold stratification |
| Filtered water | Keeps seeds moist, reduces contaminants |
| Resealable plastic bag or small airtight container | Holds pits in the fridge |
| 3–4 in (8–10 cm) pot with drainage | First home for your seedling |
| Seed‑starting mix or light potting soil | Provides airy, well‑drained medium |
| Warm, bright windowsill | Germination heat + indirect sun |
| Refrigerator | Mimics winter chill to wake the seed |
Tip: If you want quicker germination, choose fresh, locally grown cherries—seeds lose viability after long storage.
🔄 Before You Start: Understanding Cold Stratification
In nature, cherry pits endure winter cold before sprouting in spring. Cold stratification tricks the seed into thinking winter has passed, dramatically improving germination speed. A full 6–8 weeks of chilling is ideal, but even a 48–72‑hour “flash chill” can jump‑start growth for this fast‑track method.
🚀 7‑Day Sprouting Plan
Day 1 – Clean & Dry
-
Enjoy your cherries and save the pits.
-
Rinse thoroughly under running water, rubbing away any flesh.
-
Air‑dry on a towel for 2–3 hours.
Day 1–3 – Quick Chill
-
Wrap pits in a slightly damp (not dripping) paper towel.
-
Seal inside a plastic bag/container.
-
Refrigerate 48 hours (up to 7 days). Check daily for tiny root nubs.
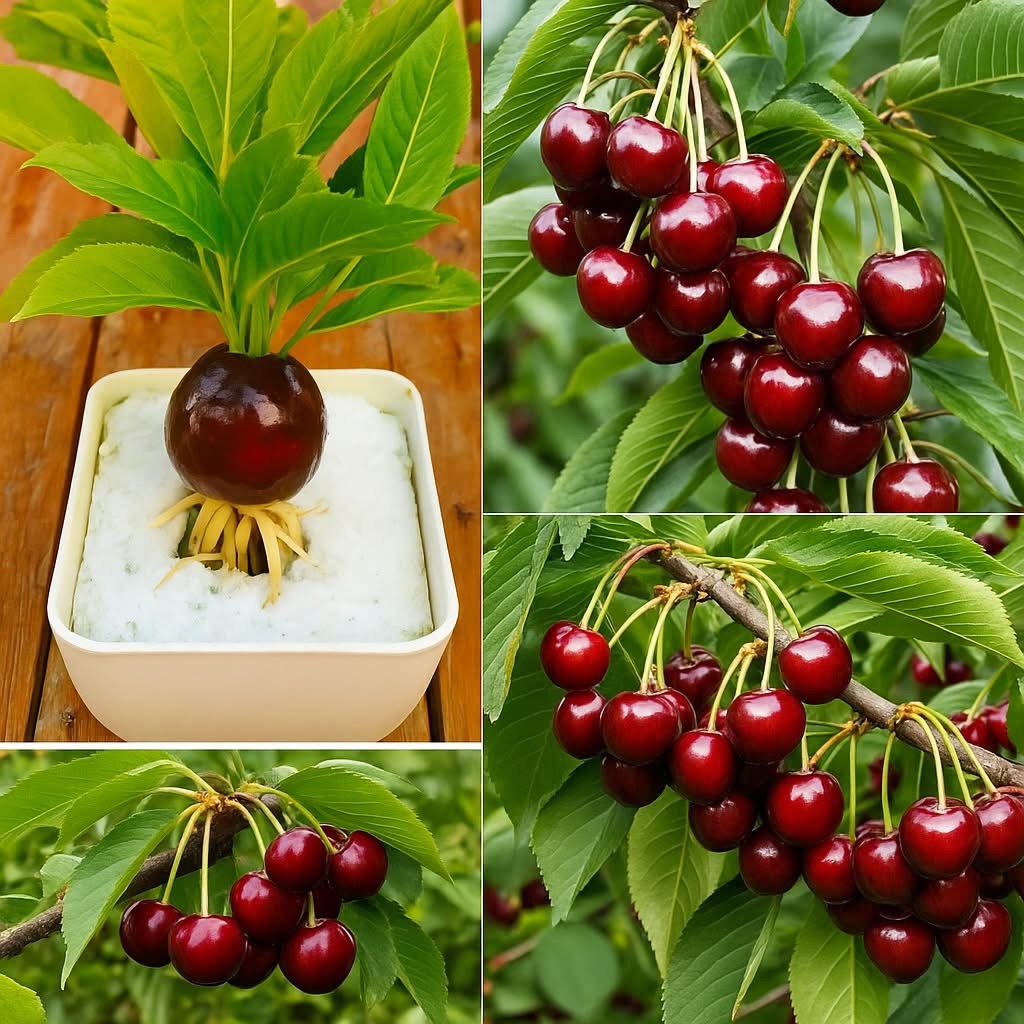
Day 3–4 – Potting Up
-
Fill your seedling pot with moist seed‑starting mix.
-
Plant sprouted seeds 1 in / 2.5 cm deep, root tip pointing down.
-
Mist soil, cover pot loosely with plastic wrap to hold humidity.
Day 4–7 – Warmth & Light
-
Place on a sunny windowsill (indirect light) or atop a seedling heat mat (75–80 °F / 24–27 °C).
-
Keep soil evenly moist, not soggy.
-
Vent the plastic daily to prevent mold.
By Day 7, you should see green shoots pushing up—or soon after. Some varieties take a bit longer; patience is part of the adventure!
🌸 A Quick History Bite
Cherry cultivation dates back more than 2,000 years to the fertile lands between the Black and Caspian Seas. Roman traders spread the trees across Europe, and by the 1600s, cherries arrived in North America with English settlers. Legend credits young George Washington’s “cherry tree” moment, cementing the fruit’s place in American lore.
💚 Ongoing Care for Your Seedling
| Growth Stage | What to Do |
|---|---|
| First true leaves(≈3 weeks) | Move to the sunniest indoor spot; rotate pot for even growth. |
| 4–6 in tall | Begin hardening off if final home is outdoors: 1 hour outside the first day, adding an hour daily for a week. |
| Transplant | Choose a larger pot or ground location with 6+ hours of sun, good drainage, and room for roots. |
| Feeding | Light, balanced organic fertilizer every 2–3 weeks during the first growing season. |
| Patience | Seed‑grown cherries may fruit in 3–7 years. The blossoms alone make the wait worthwhile! |
🍒 Nutrition Snapshot (for the Fruit You’ll Eventually Harvest)
-
Antioxidants: Anthocyanins combat oxidative stress.
-
Vitamin C: Supports immunity and collagen health.
-
Fiber: Aids digestion and promotes satiety.
-
Low calorie: Roughly 87 cal per cup.
🌟 Pro Tips & Troubleshooting
-
No sprout after 10 days? Keep soil warm and moist; some seeds need extra time.
-
Mold on towel? Replace with a fresh damp towel and wipe bag dry.
-
Leggy seedling? Increase light; use a grow lamp if windows are dim.
-
Multiple pits? Start several—seedlings vary genetically, and you can pick the strongest.
🌳 Final Thoughts
Growing a cherry tree from a pit is a joyful blend of science experiment and future harvest. In just a week you can witness germination, and with a dash of care, you’ll nurture a tree that could reward you with blossoms and fruit for decades. So next time you finish a bowl of cherries, don’t toss that pit—plant it!